FFG introduced the Hyperspace format as the premier competitive format going into 2019. It features a limited list of legal ships and upgrades, currently limited to 2.0 releases. Overall, I think the Hyperspace format is the right way to go, but the format is risky and can potentially produce worse metas. If you're strongly against Hyperspace, I think there are some strong reasons to support it. If you're strongly in favor of Hyperspace, I think there are some reasons to be cautious.
The restricted Hyperspace format is needed to make the game accessible to new players. Asking new players to buy out-of-print ships at some ridiculous mark-up on Ebay or shell out hundreds of dollars at one time for an exiting player's collection is not a reasonable way to build a competitive game. It's disappointing to not be able to use my full collection more often (I think there will continue to be some Extended events), but that's a price I'm willing to pay to make sure the game continues to grow and attract new players.
Some people seem to be hyping Hyperspace up as the answer for all the meta woes. I want to caution against these expectations. It's certainly easier to balance a smaller list of pilots and upgrades. FFG seems to have severe headcount limitations, so focusing their limited resources on a smaller card pool could be what's needed to create a balanced and open meta. However, a restricted format doesn't automatically create more balanced metas. Anyone who's played Magic: the Gathering or any other game with rotating formats knows this from experience. In fact, without a points adjustment, Hyperspace would probably be dominated by Marauder-Han Boba, Luke and Wedge, maybe TIE swarms, and perhaps some Resistance or First Order options. FFG will have to put in the work to keep this format balanced, especially with new releases (which isn't confirmed but will likely be Hyperspace-legal).
A smaller card pool could actually make the competitive play experience much worse. For example, suppose 10% of pilots are overpowered. For a format with 300 pilots, that means 30 pilots are viable at the top levels of competition. You can probably find at least one list you enjoy playing that has reasonable matchups against the best tournament lists (this has been my experience for most of 1.0 and the extended 2.0 format). For a format with 100 pilots, that means only 10 pilots are tournament-viable, and these don't have to be evenly-distributed across factions or archetypes. Your favorite faction might not have enough strong pilots to fill out even one tournament list. Your favorite archetype might not have any strong pilots in it. Your favorite archetype might only have a couple strong pilots which you don't like. You're less likely to find a list you enjoy playing that has reasonable matchups against the best tournament lists.
The solution would be to balance the game so more pilots are tournament-viable. If the top 30% of pilots are strong in the 100-pilot format, then we're back to the same number of viable tournament lists as the 300-pilot format with fewer traps. Even better, the gap between a strong pilot and an average one could be smaller. But again, this won't happen naturally; FFG will have to do the work to broaden the field of competitively-viable ships.
Part of the risk is the long 6-month time frame between rotations and point cost adjustments. On one hand, stability is good for creativity. I'm not motivated to list-build when I know the point costs will all change in a month. On the other hand, if there's a bad meta, it could take a long time for it things to change. These risks could be reduced if FFG committed more frequent reviews (maybe bi-monthly) for emergency point adjustments and/or bans. These reviews should be extremely limited and changes should only be made to the most egregious offenders. Most of these reviews shouldn't produce any changes, but having that safety net would go a long way to reducing the concerns of having a lopsided meta.
Overall, I think Hyperspace is the way to go simply to keep the game accessible. I just hope FFG puts in the work to keep an open meta with a restricted card pool.
Thursday, December 20, 2018
Tuesday, December 18, 2018
Some remaining long-term concerns with X-Wing 2.0
X-Wing 2.0 is lots of fun and much better than the original edition. With the first point cost adjustment, I'm hoping to see some of the stronger options nerfed and more viable tournament-level options. Still, while a point adjustment can fix a lot of problems, there are some remaining systemic issues with X-Wing 2.0. These issues limit the design space and create list-building traps, and fixing these will require something beyond simple point adjustments.
These massive gaps between the available attack options severely limit the available design space. There are three stats to adjust a ship's durability, and extra points of agility only create differences of 15%-20% in average damage taken. There's only one stat which affects offense, and with rare exceptions, it can only take on two values.
As a result, ships feel "samey" on offense. Ships fly and take damage very differently, but without further upgrades, it's very difficult to make ships hit harder without making them too strong. I could never get over how the intimidating Decimator hits just as hard as the cute Mist Hunter or tiny Attack Shuttle. The mechanics simply don't fit the fantasy.
Worse, the low damage output of 2-attack ships makes it very hard to build lists around them. They're almost always relegated to being support ships. A list with only 2-attack ships can even auto-lose to tanky ships like Luke or Boba Fett before the game starts. Expensive ships with 3 attack suffer from similar problems where they can't put out enough damage to justify their point cost.
This is in theory possible to fix, but there were several systemic options that could have been implemented for the new edition that are now difficult to implement. Attempts to fix this now will create mandatory upgrades, confusing new players and forcing all players to buy (possibly multiples of) specific expansions.
And no, variable costing is unlikely to fix this problem. Shield Upgrade is much better on Soontir Fel than on an Academy Pilot and it's better on Luke Skywalker than on Wedge Antilles. For variable costing to solve this problem, the cost of upgrades probably needs to be a percent of the ship's base cost, but this is too cumbersome for list-building.
This mismatch creates two problems. First, ships of different strengths can take the same upgrade. As an example, consider Shield Upgrade on a Blue Squadron Escort X-Wing compared to on Wedge Antilles. There are two approaches FFG can take and both create list-building traps. Shield Upgrade could be balanced for Wedge Antilles but too expensive for the Blue Squadron Escort. Outside of special synergies, this effectively makes Shield Upgrade a trap for any ship with a damage:durability ratio worse than Wedge Antilles. Alternatively, Shield Upgrade could be balanced for the Blue Squadron Escort and ships that make better use of the upgrade would pay a cost for their modification slot. This makes Shield Upgrade mandatory on those ships, which again creates a list-building trap.
The second problem is this mismatch encourages ships to either be run with no upgrades (outside of special synergies) or loaded with upgrades. Outside of dice caps, upgrades not only scale with the base ship's effectiveness but also with other upgrades. If you just gave your ship an upgrade to make it hit harder, then a defensive upgrade protects more value. If you make your ship harder to kill, it now gets more use out of an offensive upgrade. If upgrades are balanced for fat ships, they'll be too expensive to throw as a single upgrade on a ship. If upgrades are balanced to be the only upgrade on a ship, then fat ships will get too much from them.
It's important to note this isn't just a problem where some upgrades are stronger on some ships than others. For example, Juke is especially strong on the TIE Phantom and Whisper in particular. I don't think it's ideal, but it's not a big deal to make Juke a mandatory upgrade for them. This problem is systemic and affects all upgrades across all ships.
There is a relatively easy fix. Ships and pilots could get a flat discount or premium for all upgrades (similar to the 1.0 Vaksai title). For example, the Academy Pilot could get a 1-point discount on all upgrades while Dash Rendar must pay a 2-point premium on all upgrades. This means naked Dash can be balanced without making him a monster with upgrades, and those same upgrades can also be balanced on weaker ships. Costing each individual upgrade differently for each ship is too complicated, but the added complexity of this system is low enough so list-building remains feasible.
22 points sounds like the obvious answer, but there's a big problem with this. Against list A, taking the upgrade gives you a 20-point disadvantage and you're probably going to lose. Against list B, taking the upgrade gives you a 20-point advantage and you're probably going to win. By costing the upgrade at its average value, the game has turned into a coin flip decided by the pairings.
The solution is to overcost the upgrade, but this has its own problems. Let's say the upgrade is costed at 32 points. Now it becomes a trap. Someone might take this upgrade and effectively put himself at a disadvantage against the field. Even worse, someone playing list B might run into that player and take a random loss from their 10-point disadvantage.
The best thing to do with these upgrades is to make them so expensive they're effectively removed them from the game. High-enough point costs can be enough to discourage even newbies from taking it, thus also preventing random auto-losses from the pairings.
Thankfully, most effects don't have quite such a high swing in effectiveness across different matchups so this problem is more limited, even when those effects can be taken in multiples. Low amounts of matchup-dependent power is fine as long as in-game decisions can still overcome it.
Unfortunately, FFG has shown no fear of creating effects that differ drastically in power based on matchups: see Trajectory Simulator, pre-maneuver repositioning, and both versions of Rebel Luke Skywalker. Ahhav is a more recent example of this, although his gap in effectiveness is only ~10 points. The problem of large initiative bids and first player deciding games is a result of this systemic issue.
FFG's attitude seems to be to throw out cool effects and sort them out later with point cost adjustments, but I hope they realize some things are extremely difficult to balance through points and to stay away from them in the future.
There isn't enough variation in attack values
A 2-dice primary deals about half as much damage as a 3-dice primary, ranging from two-thirds against 0 green dice to one-third against 3 green dice with focus. A 4-dice primary deals about 60% more damage than a 3-dice primary.These massive gaps between the available attack options severely limit the available design space. There are three stats to adjust a ship's durability, and extra points of agility only create differences of 15%-20% in average damage taken. There's only one stat which affects offense, and with rare exceptions, it can only take on two values.
As a result, ships feel "samey" on offense. Ships fly and take damage very differently, but without further upgrades, it's very difficult to make ships hit harder without making them too strong. I could never get over how the intimidating Decimator hits just as hard as the cute Mist Hunter or tiny Attack Shuttle. The mechanics simply don't fit the fantasy.
Worse, the low damage output of 2-attack ships makes it very hard to build lists around them. They're almost always relegated to being support ships. A list with only 2-attack ships can even auto-lose to tanky ships like Luke or Boba Fett before the game starts. Expensive ships with 3 attack suffer from similar problems where they can't put out enough damage to justify their point cost.
This is in theory possible to fix, but there were several systemic options that could have been implemented for the new edition that are now difficult to implement. Attempts to fix this now will create mandatory upgrades, confusing new players and forcing all players to buy (possibly multiples of) specific expansions.
The upgrade model is wrong
The benefit of upgrades depends on the ship's strength and durability. For example, a tanky ship gets to use an offensive upgrade for more turns, and a defensive upgrade is more valuable on a ship with higher damage output. The cost of an upgrade is a flat number. This is a big problem.And no, variable costing is unlikely to fix this problem. Shield Upgrade is much better on Soontir Fel than on an Academy Pilot and it's better on Luke Skywalker than on Wedge Antilles. For variable costing to solve this problem, the cost of upgrades probably needs to be a percent of the ship's base cost, but this is too cumbersome for list-building.
This mismatch creates two problems. First, ships of different strengths can take the same upgrade. As an example, consider Shield Upgrade on a Blue Squadron Escort X-Wing compared to on Wedge Antilles. There are two approaches FFG can take and both create list-building traps. Shield Upgrade could be balanced for Wedge Antilles but too expensive for the Blue Squadron Escort. Outside of special synergies, this effectively makes Shield Upgrade a trap for any ship with a damage:durability ratio worse than Wedge Antilles. Alternatively, Shield Upgrade could be balanced for the Blue Squadron Escort and ships that make better use of the upgrade would pay a cost for their modification slot. This makes Shield Upgrade mandatory on those ships, which again creates a list-building trap.
The second problem is this mismatch encourages ships to either be run with no upgrades (outside of special synergies) or loaded with upgrades. Outside of dice caps, upgrades not only scale with the base ship's effectiveness but also with other upgrades. If you just gave your ship an upgrade to make it hit harder, then a defensive upgrade protects more value. If you make your ship harder to kill, it now gets more use out of an offensive upgrade. If upgrades are balanced for fat ships, they'll be too expensive to throw as a single upgrade on a ship. If upgrades are balanced to be the only upgrade on a ship, then fat ships will get too much from them.
It's important to note this isn't just a problem where some upgrades are stronger on some ships than others. For example, Juke is especially strong on the TIE Phantom and Whisper in particular. I don't think it's ideal, but it's not a big deal to make Juke a mandatory upgrade for them. This problem is systemic and affects all upgrades across all ships.
There is a relatively easy fix. Ships and pilots could get a flat discount or premium for all upgrades (similar to the 1.0 Vaksai title). For example, the Academy Pilot could get a 1-point discount on all upgrades while Dash Rendar must pay a 2-point premium on all upgrades. This means naked Dash can be balanced without making him a monster with upgrades, and those same upgrades can also be balanced on weaker ships. Costing each individual upgrade differently for each ship is too complicated, but the added complexity of this system is low enough so list-building remains feasible.
Effects that have wildly different values across matchups are impossible to balance
Suppose the meta is 50% list A and 50% list B, and an upgrade provides 2 points of value against list A and 42 points of value against list B. How much should that upgrade cost?22 points sounds like the obvious answer, but there's a big problem with this. Against list A, taking the upgrade gives you a 20-point disadvantage and you're probably going to lose. Against list B, taking the upgrade gives you a 20-point advantage and you're probably going to win. By costing the upgrade at its average value, the game has turned into a coin flip decided by the pairings.
The solution is to overcost the upgrade, but this has its own problems. Let's say the upgrade is costed at 32 points. Now it becomes a trap. Someone might take this upgrade and effectively put himself at a disadvantage against the field. Even worse, someone playing list B might run into that player and take a random loss from their 10-point disadvantage.
The best thing to do with these upgrades is to make them so expensive they're effectively removed them from the game. High-enough point costs can be enough to discourage even newbies from taking it, thus also preventing random auto-losses from the pairings.
Thankfully, most effects don't have quite such a high swing in effectiveness across different matchups so this problem is more limited, even when those effects can be taken in multiples. Low amounts of matchup-dependent power is fine as long as in-game decisions can still overcome it.
Unfortunately, FFG has shown no fear of creating effects that differ drastically in power based on matchups: see Trajectory Simulator, pre-maneuver repositioning, and both versions of Rebel Luke Skywalker. Ahhav is a more recent example of this, although his gap in effectiveness is only ~10 points. The problem of large initiative bids and first player deciding games is a result of this systemic issue.
FFG's attitude seems to be to throw out cool effects and sort them out later with point cost adjustments, but I hope they realize some things are extremely difficult to balance through points and to stay away from them in the future.
Thursday, November 8, 2018
Ship Efficiency Model: Best and Unseen Ships by Faction
I've been working on a Ship Efficiency model, and the first version is ready for release. I don't think it's perfect, but I'm at the point where I need some outside eyes to take a look at this and give suggestions. You can find the spreadsheet here. If you're interested in what the model does, you can read the summary here. Feel free to also make a copy of the spreadsheet (File -> Make a Copy) so you can dig into the calculations and/or change some assumptions.
If you need a clickbait title to get you through some exposition, you'll never guess the galaxy's best TIE Interceptor pilot! :)
(EDIT: I tried making the images bigger so they're easier to read on mobile. Apologies for how they overflow the sidebar on a PC, but the clarity is probably more important!)
As a quick introduction, I model the value of each ship in three situations, taking into account almost everything about the ships including their actions and dials. I compare these ships to the benchmark 65th percentile ships in three categories:
I use the three efficiency values to calculate each ship's balanced point cost, and the discount is the difference between the balanced point cost and the ship's official point cost. Right now, I have 80% of the weight being placed on Focus Fire with Repositioning with the other two receiving 10% of the weight.
(Quick note: Using an equal weight of 0.33 on all three categories also seems to give pretty reasonable balanced point costs. E-Wings with Proton Torps end up with higher point costs, which is desirable. It also values pre-maneuver arc-dodgers a bit lower; for example, it would say Guri's fairly-costed.)
Here are the main items the model doesn't handle well so you can adjust for them in your head:
While this model is grounded in some objective numbers, play experience, and tournament results, it requires many assumptions and judgment calls. Don't think of this as the literal truth, but rather as a consistent metric that I think can be used to value ships. Definitely play around with the numbers and feel free to use assumptions you think are more reasonable. You have my personal permission to play ships with low numbers as long as you're having fun, and you're not a bad person if you only play ships with the highest numbers.

Conveniently, the model says the generic T-65 X-Wing, TIE Fighter, and Firespray are all appropriately costed. Boba Fett without the Marauder/Han combo, Duchess, and Attack Shuttle Hera with a Dorsal Turret are also benchmark ships. I had the model weigh Focus Fire with Repositioning efficiency most heavily when calculating balanced points, so these ships are all close to the 65th-percentile there but can differ wildly in the other efficiency metrics.

At first glance, Rebels have several extremely efficient ships including the four most efficient ships in the game. Why are they under-performing in tournaments?
A closer look reveals their problems. First, their top pilots are often repeats. If Rebel players could use Legends cloning technology to bring three Luukes or five Saabines, they'd probably win more games (amusingly, Rebels still wouldn't have good tournament results since these players would count as Scum). Second, Sabine and Luke are dependent on arc-dodging in a balanced initiative meta. With 25% of ships in tournaments having initiative 5 (often with large bids) and 15% having initiative 6, their arc-dodging abilities become less valuable.
The list of efficient Rebel ships is rounded out by the other Rebel standout Wedge Antilles and a bunch of problematic ships. The Sheathipedes are efficient, but have few ideal support targets. The other Attack Shuttles are good but face a different kind of cost constraint (the one in the real world). The ARC-170s are poor squadmates for Sabine and Luke because of their mismatched damage-to-durability ratios. They don't have enough damage output to punish opponents that focus on Sabine and Luke first. Thane Kyrell is the best of the rest. The list of good Rebel options is noticeably shorter than other factions.
Rebel's best bet might be to stuff Luke, Sabine, Wedge, and a good fourth ship (Thane) into a list. Pairing Luke and Sabine with Shara Bey and a Sheathipede is another potential option. Adding Selfless on an ARC-170 might also be enough to make them good partners for the more fragile Luke and Sabine.

The buffers Captain Jonus and Colonel Jendon top the list with their best squadmates. They're still in the top 25 if you're crazy like a fox and take a naked Captain Jonus or bring Colonel Jendon with Sloane and five naked TIE Bombers. Even better, the best squadmate for these ships, the TIE Bomber (with or without Barrage Rockets), is also extremely efficient.
The popular Imperial aces also show up: Whisper, Redline, Soontir, Vader, and the other Juke Phantoms round out the top 50. It's no surprise these ships often place highly in tournaments. Other popular ships include the TIE Reapers and Lieutenant Sai.
Turr Phennir is the biggest surprise (we've answered the clickbait question!). The model says he's one of the strongest ships in a balanced initiative meta. He's probably the biggest victim of today's top-heavy meta: his efficiency drops to 2% below the benchmark when 40% of ships are above initiative 4. Keep an eye out for him if the popular high-initiative ships get nerfed. Saber Squadron Ace is a similar but less extreme story.
Secret Service Iden Versio shows her value when she's protecting Madam President Howlrunner. Note Howlrunner herself is nowhere on the list (she's -4%), and Iden's also much less efficient without a VIP to protect.
Finally, Night Beast reprises his early 1.0 role as a cheap and efficient filler. He's less of a damage threat compared to several of the other TIE Fighter aces, but he's much more likely to stick around. You might want to give him a try next time you need a filler ship.

The usual suspects come early in the line-up. Quadjumpers, Escape Crafts, Drea, Guri, Marauder/Han Boba Fett, and Palob all top the list. 4-LOM would probably be a bit higher if it was easier to properly value his ability; he's a top-35 ship with Advanced Sensors and the title if he cleared his stress every round without passing it to any ship, and he's still efficient naked if his ability was just worth 3 points.
Unkar Plutt seems to be the best Quadjumper by far even with a conservative estimate of his ability, but it seems like few people take him over the cheaper generics. I'm wondering if higher initiative is a big handicap for Quadjumpers (I'm currently not taking initiative into account for the tractor beam). Quadjumpers are also big targets, so maybe the extra points aren't worthwhile for a ship that will be focus fired early.
The biggest surprise is probably Han Solo, especially since he might be more efficient without the title than with it. After some initial hype, it seems like Scum Han couldn't overcome his default 2-dice attack and mostly disappeared from the top tables. That said, my assumptions may be generous, and I don't add any value for being able to dock an escape craft.
One last thing I want to highlight is the Bounty Hunter with the Marauder/Han combo showing up at #45. As we saw earlier, Boba Fett and the generic Firespray are pretty fair. I think we can all agree it's Marauder/Han that's too strong. I hope Boba Fett won't face any direct nerfs despite his strong showing in tournaments.

It's a bad sign when taking upgrade so you can use your pilot ability makes your ship worse. Rebels do have some efficient ships with coordinate, but so do all the other factions. Their best non-coordinate support ship (ARC Garven) is highly unreliable.
But maybe the buff targets are really good so the support can be worse (even though this doesn't really work)?

Well, there goes that idea. Shara Bey and Edrio Two-Tubes are decent when supported, but not enough to make up for having to bring a wildly inefficient support ship.
It's no surprise Rebels are weak. I'd expect significant buffs to all of these support ships and at least a 1-point cost reduction for Perceptive Co-Pilot.
Beyond the lackluster support ships,


If you need a clickbait title to get you through some exposition, you'll never guess the galaxy's best TIE Interceptor pilot! :)
(EDIT: I tried making the images bigger so they're easier to read on mobile. Apologies for how they overflow the sidebar on a PC, but the clarity is probably more important!)
- Joust Efficiency is the ship's efficiency in focus-fire situations where repositioning isn't useful (e.g. your other ships will still be in arc).
- Focus Fire with Repositioning (FFwR) efficiency is the ship's efficiency in focus-fire situations where the ship's maneuverability and repositioning abilities can let them survive to make more attacks by avoiding arcs.
- 1v1 Efficiency is the ship's efficiency in end-game or isolated situations and includes the bonus for repositioning.
I use the three efficiency values to calculate each ship's balanced point cost, and the discount is the difference between the balanced point cost and the ship's official point cost. Right now, I have 80% of the weight being placed on Focus Fire with Repositioning with the other two receiving 10% of the weight.
(Quick note: Using an equal weight of 0.33 on all three categories also seems to give pretty reasonable balanced point costs. E-Wings with Proton Torps end up with higher point costs, which is desirable. It also values pre-maneuver arc-dodgers a bit lower; for example, it would say Guri's fairly-costed.)
Here are the main items the model doesn't handle well so you can adjust for them in your head:
- It doesn't handle the flexibility of focus tokens. Ships with low agility and evade and ships with single calculate and target lock may be slightly overvalued.
- It's not great at modeling attacks which require a target lock. I use a hack to address this issue, but low initiative ships may not have a large enough penalty compared to mid-initiative ships.
- Even when I exponentially discount ship durability, the model seems to undervalue front-loaded damage. For instance, it recommends both the E-Wing with Proton Torps and the VCX-100 should cost under 67 points.
- Keep in mind squad efficiency is different from an individual ship's efficiency. If you pair glass cannon ships with tanky ships, your squad efficiency will differ wildly based on which your opponent attacks first.
While this model is grounded in some objective numbers, play experience, and tournament results, it requires many assumptions and judgment calls. Don't think of this as the literal truth, but rather as a consistent metric that I think can be used to value ships. Definitely play around with the numbers and feel free to use assumptions you think are more reasonable. You have my personal permission to play ships with low numbers as long as you're having fun, and you're not a bad person if you only play ships with the highest numbers.
Benchmark ships
It's helpful to see what the ships are compared to before we go into the factions. I'll focus mostly on the Focus Fire with Repositioning efficiency in the later sections, but first, let's take a look at some ships the model believes to be correctly costed against the benchmark of the 65th-percentile ship.Best Ships: Rebels
At first glance, Rebels have several extremely efficient ships including the four most efficient ships in the game. Why are they under-performing in tournaments?
A closer look reveals their problems. First, their top pilots are often repeats. If Rebel players could use Legends cloning technology to bring three Luukes or five Saabines, they'd probably win more games (amusingly, Rebels still wouldn't have good tournament results since these players would count as Scum). Second, Sabine and Luke are dependent on arc-dodging in a balanced initiative meta. With 25% of ships in tournaments having initiative 5 (often with large bids) and 15% having initiative 6, their arc-dodging abilities become less valuable.
The list of efficient Rebel ships is rounded out by the other Rebel standout Wedge Antilles and a bunch of problematic ships. The Sheathipedes are efficient, but have few ideal support targets. The other Attack Shuttles are good but face a different kind of cost constraint (the one in the real world). The ARC-170s are poor squadmates for Sabine and Luke because of their mismatched damage-to-durability ratios. They don't have enough damage output to punish opponents that focus on Sabine and Luke first. Thane Kyrell is the best of the rest. The list of good Rebel options is noticeably shorter than other factions.
Rebel's best bet might be to stuff Luke, Sabine, Wedge, and a good fourth ship (Thane) into a list. Pairing Luke and Sabine with Shara Bey and a Sheathipede is another potential option. Adding Selfless on an ARC-170 might also be enough to make them good partners for the more fragile Luke and Sabine.
Best Ships: Imperials
The buffers Captain Jonus and Colonel Jendon top the list with their best squadmates. They're still in the top 25 if you're crazy like a fox and take a naked Captain Jonus or bring Colonel Jendon with Sloane and five naked TIE Bombers. Even better, the best squadmate for these ships, the TIE Bomber (with or without Barrage Rockets), is also extremely efficient.
The popular Imperial aces also show up: Whisper, Redline, Soontir, Vader, and the other Juke Phantoms round out the top 50. It's no surprise these ships often place highly in tournaments. Other popular ships include the TIE Reapers and Lieutenant Sai.
Turr Phennir is the biggest surprise (we've answered the clickbait question!). The model says he's one of the strongest ships in a balanced initiative meta. He's probably the biggest victim of today's top-heavy meta: his efficiency drops to 2% below the benchmark when 40% of ships are above initiative 4. Keep an eye out for him if the popular high-initiative ships get nerfed. Saber Squadron Ace is a similar but less extreme story.
Secret Service Iden Versio shows her value when she's protecting Madam President Howlrunner. Note Howlrunner herself is nowhere on the list (she's -4%), and Iden's also much less efficient without a VIP to protect.
Finally, Night Beast reprises his early 1.0 role as a cheap and efficient filler. He's less of a damage threat compared to several of the other TIE Fighter aces, but he's much more likely to stick around. You might want to give him a try next time you need a filler ship.
Best Ships: Scum
The usual suspects come early in the line-up. Quadjumpers, Escape Crafts, Drea, Guri, Marauder/Han Boba Fett, and Palob all top the list. 4-LOM would probably be a bit higher if it was easier to properly value his ability; he's a top-35 ship with Advanced Sensors and the title if he cleared his stress every round without passing it to any ship, and he's still efficient naked if his ability was just worth 3 points.
Unkar Plutt seems to be the best Quadjumper by far even with a conservative estimate of his ability, but it seems like few people take him over the cheaper generics. I'm wondering if higher initiative is a big handicap for Quadjumpers (I'm currently not taking initiative into account for the tractor beam). Quadjumpers are also big targets, so maybe the extra points aren't worthwhile for a ship that will be focus fired early.
The biggest surprise is probably Han Solo, especially since he might be more efficient without the title than with it. After some initial hype, it seems like Scum Han couldn't overcome his default 2-dice attack and mostly disappeared from the top tables. That said, my assumptions may be generous, and I don't add any value for being able to dock an escape craft.
One last thing I want to highlight is the Bounty Hunter with the Marauder/Han combo showing up at #45. As we saw earlier, Boba Fett and the generic Firespray are pretty fair. I think we can all agree it's Marauder/Han that's too strong. I hope Boba Fett won't face any direct nerfs despite his strong showing in tournaments.
When Your Faction Identity Sucks
Rebels were advertised as the faction of friends helping each other out. Well, part of the reason Rebels are having so much trouble is because their support ships are almost all bad.
It's a bad sign when taking upgrade so you can use your pilot ability makes your ship worse. Rebels do have some efficient ships with coordinate, but so do all the other factions. Their best non-coordinate support ship (ARC Garven) is highly unreliable.
But maybe the buff targets are really good so the support can be worse (even though this doesn't really work)?
Well, there goes that idea. Shara Bey and Edrio Two-Tubes are decent when supported, but not enough to make up for having to bring a wildly inefficient support ship.
It's no surprise Rebels are weak. I'd expect significant buffs to all of these support ships and at least a 1-point cost reduction for Perceptive Co-Pilot.
Beyond the lackluster support ships,
Where's the TIE Swarm?
The TIE Swarm had lots of hype before the new edition launched, but they haven't seen much play afterwards.
The model suggests most TIE Fighters are appropriately costed or slightly overcosted. They might actually be fine since the model doesn't seem to value up-front burst damage as highly as it should. Why doesn't the TIE Swarm see any play?
I think we all know the answers to that question. First, the top tables are filled with much stronger ships. Second, they have to compete against better swarms. We've already seen how efficient Jonus, Jendon, and Drea are. The Sloane swarms have equally average TIE Interceptors and TIE Strikers, but these glass cannons get the most value out of Admiral Sloane's Biggs effect on a tanky ship. Finally, the TIE Swarm suffers the most from Trajectory Simulator, something which is not in the model.
I love the looks of a TIE Swarm on the board, and hopefully the first round of buffs and nerfs will bring these back into popularity.
Jumpmaster Woes
I have to eat some crow here. I never thought the 2.0 Jumpmaster was great, but I thought it might be decent. Well, it's not. To be fair, I don't give the Jumpmaster with the title any credit for its mobile arc. Still, rotating the arc requires taking a stress and the Jumpmaster's green maneuvers are not ideal so it's not worth that many points. Scum has a lot of good options, but the Jumpmaster isn't one of them.

The Slumber of Fat Turrets
Fat turrets were too strong in X-Wing 1.0. In the transition, they lost half their arcs and all of their good action-efficiency upgrades. Their current state is not pretty.
The Scum Falcon's OK (although I'm not sure they qualify as "fat" turrets), and Lando in the Rebel Falcon is the closest other ship to matching the benchmark. The rest are extremely weak and it's no surprise they don't see much play.
These ships will probably see some buffs, but more importantly, they'll also improve when better upgrades are released. Fat turrets should have their day in the sun again soon.
Anyway, I hope you enjoyed this introduction. Feel free to check out the spreadsheet and let me know if you have any suggestions for improving it!
Tuesday, October 23, 2018
My Experience and Lists at the PTL Open 2018

I'm the one in the light-blue sweater, front-left
The second PTL was this past weekend, and man was it fun! The format required you to bring 3 different lists with no repeated named pilots (in the same faction). Each game, you pick which list you fly without seeing your opponent's lists. You get an extra win if you fly all three lists at least once, and some acrylic force tokens if you fly the lists twice each. If you make the top 8, you can only fly each list once.
The first PTL Open was actually a bit stressful for me. I hate losing games just based on matchups and the matchups could be really skewed in X-Wing 1.0. Finding three lists I enjoyed that didn't have matchup problems was tough. I ended up going with 3 meta lists and didn't really enjoy the event.
X-Wing 2.0 changed everything. I can take a somewhat experimental list and know the game will come down to play on the board, and I can also bring strong lists without killing the game for my opponent. Not only does it make the over-the-board play more enjoyable, it also makes list-building fun again. Coming up with a strong list now gives you an edge without destroying the game. What was once a stressful format is now a more relaxed format that rewards creativity and adds more variety into two days of X-Wing.
Besides the main event, there was also a Furball, some 200-point Armada on an X-Wing mat, and beer. If you have a chance to go to the next PTL Open, you definitely should!

Huge props to the organizers of the tournament at the Prototype Toronto League: Devon Monkhouse, Alexandra LeBlanc, Aaron P, Perry Low, Tim Bo, Sumeet Vats, and Mike R. Thanks to Victor and Travis of vttv for streaming the games so my friends at home can see my questionable flying skills :). Finally, a shout-out to all of my opponents for the great games, and congrats to Aaron D. and Robin for beating me in two well-flown games!
My Lists
I don't want to do a long BatRep, but I do want to share the lists I brought. For my three lists, I decided to bring one for each of the current factions (Rebel, Imperial, and Scum). Overall, I wanted to take advantage of strong cards in unusual ways. I don't have the sample size to say how strong these lists are, but I think two of them can potentially contend in the top tier and the third can be strong in the hands of a skilled player.One thing you'll notice is my combined bid across all three lists is 0. I got annoyed with the crazy bids in the meta (the largest bid at the event was 22 points with Boba Fenn!) and decided to skip the whole mini-game. Besides, I wanted practice pinning down arc-dodgers while moving first. If you want to take some of these lists and care more about the results than practice, you can consider cutting some things for a bid.
Rebel List: Not Quite Civilizations
Wedge Antilles, T-65 X-Wing (52)
Servomotor S-Foils
Luke Skywalker, T-65 X-Wing (62)
Servomotor S-Foils
Thane Kyrell, T-65 X-Wing (48)
Servomotor S-Foils
Sabine Wren, Attack Shuttle (38)
Total: 200 points
This list started as Wedge, Luke, and two Blue Squadron Escorts (hence the name). My friend Marc suggested adding Thane, and I think Sabine's the best choice for the remaining points. Biggs Darklighter can also fit in place of Thane Kyrell, depending on if you want a third high-initiative ship or to protect your other ships.
I think the easiest option for Rebels right now is to put four quality guns on the table. Three ships don't have the health to survive a ship dying early. For example, against Boba Guri, Sabine died in the opening salvo before she could shoot. Still, she absorbed my opponent's first and best salvo and the three X-Wings cleaned up. Five ships don't have the same individual ship quality and are much harder to coordinate.
I think these four ships are some of the best options for Rebels. Wedge is great against defense-reliant ships and I5 aces including Boba Fett and Whisper. Luke hits really hard and is annoying to kill. Thane is a cheap I5 ace and has a nice ability. Sabine's one of the best cheap ships for Rebels, especially if you can get her a free evade by doing a barrel roll and a blue maneuver (I couldn't set it up and played against lots of Palob, so she died a lot). Other options to consider include Norra Wexley in the ARC, a HWK with Moldy Crow, and maybe Ten Numb with Advanced Sensors in the B-Wing.
Despite the general consensus that Rebels are weak, it beat three "meta" Scum lists: Boba Guri, Guri Palob L3-37 2xJakku, and Guri 4-LOM Palob. I didn't fly this list to its potential; I could never get Sabine her free evade, for example. It could have weaknesses against some other lists, but I'd feel confident taking this into any serious competition.
Imperial List: Not Quite TIE Fighter
Darth Vader, TIE Advanced x1 (85)
Supernatural Reflexes
Fire-Control System
Rho Squadron Pilot, Alpha-class Star Wing (59)
Trick Shot
Os-1 Arsenal Loadout
Proton Torpedoes
Adv. Proton Torpedoes
Fire-Control System
Advanced SLAM
Colonel Jendon, Lambda-class T-4a Shuttle (56)
Admiral Sloane
Total: 200 points
The Torpedo Combo on the Missile Boat effectively gives it a 4-dice attack against its locked target that gets the range 1 bonus but doesn't give the range 3 bonus. The Missile Boat works well with Colonel Jendon, both with Coordinate and with his ability. I wanted an ace that also works with Jendon, so I took Vader. I also threw in Admiral Sloane as a last-minute inclusion. 10 points to turn the tanky Lambda Shuttle into Biggs felt too good to pass up. The shuttle was the only ship I lost in all of my games with this list, but I don't think I took full advantage of Sloane due to my inexperience with the list and it's hard to know how much it helped. A 10-point bid is also a consideration.
This was definitely my most skill-dependent list. My rustiness and lack of experience with the Missile Boat showed in my results. Both of my losses were with this list. The first loss was to a Biggs + 2x Selfless 4-ship Rebel list where my abilities force me to help him spread damage. The second loss was a rematch against Robin's squirrely Echo Whisper Soontir list where he learned from our first encounter (a close win for me). Still, I made some decisive mistakes in both games. I think this list has potential and can be strong in the hands of a good player.
Scum List: Not What It Looks Like

Boba, Nym, and... wait, what?
Koshka Frost, Firespray-31 (86)
Proton Bombs
Marauder
Han Solo
0-0-0
Sol Sixxa, Scurrg H-6 Bomber (71)
Dorsal Turret
Proton Bombs
Proximity Mines
Havoc
Trajectory Simulator
Genius
Captain Jostero, Kihraxz Fighter (43)
Total: 200 points
This list was designed to use strong components in new ways. Everyone knows by now that Boba Fett with Marauder, Han Solo, 0-0-0, and Proton Bombs is really strong. While Boba's rerolls get stronger with extra focus and calculate tokens, part of the reason I built this list is to show it's really the upgrade cards that make Boba Fett too strong (Boba Fett by himself is probably about where he should be).
Koshka Frost gets fewer rerolls than Boba Fett, but she's cheaper and takes advantage of these upgrades about as well. She can't use Han to get a focus for defense as often, but she still gets fully-modded attack dice when she wants. Her ability makes 0-0-0 better and deters linked actions and K-Turns. Amusingly, Koshka's ability is especially good against Boba Fett with Han gunner. The points saved by using Koshka Frost instead of Boba Fett will be put to good use in this list.
The other reason I built this list was to show bombs are too strong on ships with rear arcs. Proton Bombs deal a crit for 5 points and can potentially hit multiple ships. Compare that to Proton Torpedoes, which adds less than 1 crit for 9 points. The main drawback of Proton Bombs is it's harder to land. The only way for a front-arc ship to land Proton Bombs without giving up a shot is to fly into the enemy ship's face and survive a turn to drop the bomb while K-Turning behind them.
Bombs on a ship with a rear arc are much easier to land without giving up shots because they cover the easiest ways of dealing with these ships. Paradoxically, chasing ships with a rear arc is often the most consistent way to get shots on them. If you joust them head-on from close or intermediate range, the rear-arc ship can do any turn, fast bank, or fast straight to keep you in arc. It's difficult to call the correct move to keep them in arc, and a K-Turn might cover the most options. Bombs take away all of these consistent ways of engaging these rear-arc ships and force opponents into predictable engage-disengage patterns.
I wanted my second ship to also bring bombs and a rear arc, and a Scurrg with a Dorsal Turret was the obvious choice since it also brings Trajectory Simulator. Trajectory Simulator is the other way to easily land bombs without giving up shots. I chose Sol Sixxa with Proximity Mines over Captain Nym with Seismic Bombs for a few reasons. First, a list with bombs and low-initiative ships with rear arcs want to keep rocks on the board to limit enemy movement. Second, Proximity Mines with flexible drops let me deal more easily with nimble aces. Mobile ships may be able to get away from bombs, but they can't escape from a Proximity Mine dropped on top of them. Finally, Sol Sixxa's initiative 3 lets me move and attack in any order. Without a bid, Captain Nym's initiative 5 has limited value.
Captain Jostero is an easy inclusion with all of these bombs. He adds a sorely-needed third 3-dice attack. He's worth his points even if he gets one extra attack off, and I got at least one bonus attack in all three games with this list. Combined with a Trajectory Simulated Proton Bomb and Koshka's fully modified attack dice, this list has a fearsome opening salvo on top of the bombs.
This list beat a Sloane Whisper + 3 Strikers with Crack Shot and Bombs list, a Boba 4-LOM Palob list, and a 3 Torpedo X-Wings list. I landed multiple bombs in every game. The strategic value of bombs were especially clear in the top-8 game against the X-Wings. In the opening maneuvers, my opponent went a bit too fast and I forced the turn 2 bump with Koshka Frost. Captain Jostero and Sol Sixxa were lagging behind in the asteroid corridor and would normally have been an easy next target. However, Koshka Frost and Trajectory Simulator meant he'd have to take 2 Proton Bombs to turn into the corridor and go after them. Instead, he tried to disengage. The X-Wings spent most of the game taking damage while running away. By the time they turned around, it was too late and I still landed three bombs, including the one in the picture that barely caught Luke. (Fun note: Technically, I landed 5 bombs. Sol Sixxa took a shield from the Trajectory Simulator bomb after banking to cover the X-Wings' disengage. And in the system phase after the turn in the picture, I misjudged the Proximity Mine drop by millimeters and landed it perfectly for Koshka Frost's 2-turn.)
I hope you enjoyed reading about the event and my lists. Feel free to try them out with any changes you like. If you're in the Toronto area next year when the PTL Open runs again, I highly recommend checking it out!
Monday, September 24, 2018
Using High School Math After High School: How Good are Bullseye Arc Abilities?
A few days ago, I was tweaking my ship efficiency spreadsheet and came across a problem. Some pilot abilities like Torani Kulda's and Soontir Fel's only trigger when enemy ships are in their bullseye arc. To properly evaluate these ships, I need to put in how many times these abilities will trigger each game. What's a reasonable number to put in?
In other words, I need the chance an enemy ship will also be in your bullseye arc when you catch it in your firing arc.


Just like in the textbooks, you can scroll down to last section of this post (titled "Out of the spreadsheet, onto the board"). I've put all the final numbers there, and the discussion afterwards simplifies everything to just the important takeaways.
For everyone else who loves math (all three of you), or if you're a parent who wants to spend a fun afternoon bonding with your kids by doing some math problems (you can tell I'm neither a parent nor a kid), read on!
All information in this article is presented "as-is". The author makes no representations and extends no warranties of any type as to the accuracy or completeness of any information in this article. Please let me know if you find any algebra or copy-paste mistakes.
We can start by asking what fraction of the forward firing arc the bullseye arc takes up. Calculating the area of the total firing arc and the bullseye arc is pretty straightforward:

Now we can plug in some numbers:
After some number crunching and dividing the area of the bullseye arc by the area of the firing arc, we get the following percentages:


These numbers don't quite answer our question. They tell us how often a random dot in the forward firing arc ends up in the bullseye arc. Problem is, ships in X-Wing aren't dots (even if my opponent's ships sometimes feel like dots). Ships are (almost) squares that take up a significant amount of space. How does that change our answer?
Let's go back to the equation for the fraction of the firing arc that the bullseye arc takes up:

Using ship bases instead of dots will increase both the area of the bullseye arc and the area of the firing arc. When both the numerator and the denominator increases, it's not obviously clear whether the fraction will get larger or smaller.
However, there is a way to intuitively figure out whether the fraction goes up or down.
Fractions go up if multiplied by numbers larger than 1 and go down if multiplied by numbers smaller than 1. In other words, whether the bullseye arc percentage goes up or down depends on the percent increase of the bullseye arc compared to the percent increase of the firing arc when we go from dots to ship bases.
It's pretty clear the percent increase in the bullseye arc will be larger than the percent increase in the firing arc. Here's another bad paint picture where I widen the edges of the firing arc and bullseye arc to reflect a hypothetical ship base (ignore that it's circular and too small). While there's more teal in the picture, the red is a much larger percent of the bullseye arc than the teal for the firing arc.

That means the numbers from before are too small.
The answer depends on the size of our ship, the size of the enemy ship, and the orientation of the enemy ship. Small enemy ships and ships parallel to ours will increase the arcs the least. Large enemy ships and ships offset by 45 degrees will increase the arcs the most. So, we'll run the numbers for each combination of ship bases and the two orientations to get an upper and lower bound.
I'm also going to make some assumptions to simplify the calculations. The first is I'm going to treat all enemy ship bases as square (40mm for small ships, 60mm for medium ships, 80mm for large ships), even though they are slightly rectangular in practice. The second is I'm going to ignore the plastic part of our ship's base. This will save us an annoying calculation and only slightly overestimate the size of the firing arc.
Let's start with how the areas change when the enemy ship is parallel to ours.

For the bullseye arc, it's easiest to use the center of the enemy ship as the point of reference. The center of the enemy ship can be up to half of the width of the enemy ship base from the edge of these areas. That means each side of the rectangle moves out by half the enemy ship's width, or the total width of the rectangle increases by one enemy ship base.
The height of the bullseye arc actually stays the same. The center of the enemy ship base can be half of the enemy ship's length farther and still be in arc. However, the center of the enemy ship can't be any closer than half of the enemy ship's length or it'd overlap your ship. These cancel out, so the height doesn't change.
For the firing arc, it's best to keep the center rectangle the same and just work with the wings. For the wings, things get a bit messier because the corner of the enemy ship that touches the firing arc changes. The best way to figure out what's going on is to draw a picture, so here we go:

We can immediately see it's easiest to use the bottom-left corner of the enemy ship as our reference point for the right wing and double this area to account for the left wing. This lets us model the area of the wing as the same slice from the circle as calculated using dots plus the area of a parallelogram with height h and base b as indicated (thanks to our simplifying assumption of ignoring the plastic part of our ship base). The height of this parallelogram is the length of the enemy ship base.
Now we only need to calculate the base of the parallelogram, so it's time to bust out trigonometry!

We have a right triangle. We know the hypotenuse (longest side, opposite the right angle) is 300mm, the length of the range ruler. We also know the angle of the corner closest to our ship is 90 degrees minus the angle of the slice. The cosine function gives us the relationship between an angle of a corner, the length of the hypotenuse, and the length of the non-hypotenuse side attached to the corner. The length of the base is equal to the cosine of the angle multiplied by the hypotenuse. (If you don't remember much about cosine, just treat it as a button on your calculator. Plug in your angle, hit the button, and it gives you a number which you'll multiply the hypotenuse by. Just make sure it takes degrees and not radians.)
Now we have all the numbers we need. Be careful to take the numbers based on the size of your ship and the size of the enemy ship!

We also need to know what happens when the enemy ship is offset by 45 degrees, because that should make the bullseye arc even larger. Things get messy, but thankfully I can gratuitously abuse the power of simplifying assumptions to make things easy again.
Let's start with the firing arc. It's actually the easy part, wings and all.

If we use the bottom corner of the enemy ship as the reference point, then we can use the original rectangular and wing portions of the firing arc that we calculated back when we used dots instead of ship bases. We just need to add the area of that orange rectangle outside the wings, where one side is the length of the range ruler and the other side is the length of the enemy ship.
Now let's look at the bullseye arc. We'll go back to using the center of the enemy ship as the reference point.

The trapezoid at the top is pretty easy. But see those little triangles at the bottom? They're -censored-.
I'm invoking the power of simplifying assumptions and pretending they don't exist. That's actually accurate for large-base ships, but those triangles will be bigger for small-base ships. I don't care, they're not worth it.
Now that we've ignored the hard part, the problem is easy to solve. The height of the rectangle is the range ruler minus half the diagonal of the enemy ship base. The width is the width of the bullseye arc plus the diagonal of the enemy ship base.
The trapezoid is also pretty straightforward. The area of a trapezoid is its height times the average of the two bases. The height is half the diagonal of the enemy ship base. The long base is the width of the bullseye arc plus the diagonal of the enemy ship base. The short base is just the width of the bullseye arc.
Now, let's plug some numbers in:
And we get these results:
This is left as an exercise for the reader.
First, let's recap the numbers. Here are the percentages of the total firing arc that the bullseye arc makes up. They depend both on the size of your ship (the shooting ship) and the size of the enemy ship (the target). The smaller number is if they're parallel to your ship, and the large number is if they're offset by 45 degrees.
That's a lot of numbers.

So let's simplify things. A survey by Gold Squadron Podcast found games averaged 11 rounds with 8 rounds of combat in X-Wing 1.0. I don't think this changed much in 2.0. Roughly 1-in-6 to 1-in-3 shots will be in your bullseye arc. You can reasonably expect 1 to 3 bullseye shots per game for ships that survive the full game and don't miss chances to shoot. Finally, while the size of your target matters a great deal, the size of the shooting ship doesn't matter too much. You don't have to feel too bad if you put a bullseye arc ability on a large ship.
Based on these numbers, here are some strategies which will significantly increase the number of bullseye shots you get:
This can help you make decisions when list-building. For example, Predator may be hard to value if you think of it as a reroll for shots in your bullseye arc. Predator granting you roughly two random rerolls per game is much easier to think about. If Predator requires two uses to produce an extra hit but you're only averaging two uses of it per game, Crack Shot may be a better choice.
Now, go out there and try lining up your bullseye arc (or not)! Don't follow my example and spend more time mathing X-Wing 2.0 than playing it :).
In other words, I need the chance an enemy ship will also be in your bullseye arc when you catch it in your firing arc.

Irfanview has a paint feature!
Turns out, we can answer this question with some high school math. Take that, everyone who says you'll never use high school math after high school!
Do board games count? I'm not sure board games count.
Just like in the textbooks, you can scroll down to last section of this post (titled "Out of the spreadsheet, onto the board"). I've put all the final numbers there, and the discussion afterwards simplifies everything to just the important takeaways.
For everyone else who loves math (all three of you), or if you're a parent who wants to spend a fun afternoon bonding with your kids by doing some math problems (you can tell I'm neither a parent nor a kid), read on!
All information in this article is presented "as-is". The author makes no representations and extends no warranties of any type as to the accuracy or completeness of any information in this article. Please let me know if you find any algebra or copy-paste mistakes.
A decent place to start
We can start by asking what fraction of the forward firing arc the bullseye arc takes up. Calculating the area of the total firing arc and the bullseye arc is pretty straightforward:
- The bullseye arc is a rectangle. The area of a rectangle is its width times its height.
- The forward firing arc can be divided into two areas. First, there's the rectangle that extends from the width of the firing arc. Again, the area of this is its width times its height.
- The second firing arc area is the two wings that extend past the edges of the ship base. These are slices from a circle, and the area of a slice is equal to πr2 times the angle/360.
Here's a bad paint picture with these areas highlighted. We can clearly see why I'm not an artist.

- The length of the range ruler is 300mm. This is the height of the rectangles and the radius of the wings.
- The width of the bullseye arc is roughly 15mm.
- The width of a firing arc is roughly 34mm for small ships, 53mm for medium ships, and 72mm for large ships.
- The angle of each wing slice is half the angle of the firing arc. According to mu0n, the angle is 40.62 degrees for small ships, 41.4 degrees for medium ships, and 41.76 for large ships.
After some number crunching and dividing the area of the bullseye arc by the area of the firing arc, we get the following percentages:
- 6.1% for small ships
- 5.6% for medium ships
- 5.2% for large ships
In other words, you'd expect a bullseye shot roughly one-in-sixteen to one-in-twenty shots.

I did everything wrong

These numbers don't quite answer our question. They tell us how often a random dot in the forward firing arc ends up in the bullseye arc. Problem is, ships in X-Wing aren't dots (even if my opponent's ships sometimes feel like dots). Ships are (almost) squares that take up a significant amount of space. How does that change our answer?
Let's go back to the equation for the fraction of the firing arc that the bullseye arc takes up:

Using ship bases instead of dots will increase both the area of the bullseye arc and the area of the firing arc. When both the numerator and the denominator increases, it's not obviously clear whether the fraction will get larger or smaller.
However, there is a way to intuitively figure out whether the fraction goes up or down.
Fractions go up if multiplied by numbers larger than 1 and go down if multiplied by numbers smaller than 1. In other words, whether the bullseye arc percentage goes up or down depends on the percent increase of the bullseye arc compared to the percent increase of the firing arc when we go from dots to ship bases.
It's pretty clear the percent increase in the bullseye arc will be larger than the percent increase in the firing arc. Here's another bad paint picture where I widen the edges of the firing arc and bullseye arc to reflect a hypothetical ship base (ignore that it's circular and too small). While there's more teal in the picture, the red is a much larger percent of the bullseye arc than the teal for the firing arc.

Doing things right (for parallel ships)
The answer depends on the size of our ship, the size of the enemy ship, and the orientation of the enemy ship. Small enemy ships and ships parallel to ours will increase the arcs the least. Large enemy ships and ships offset by 45 degrees will increase the arcs the most. So, we'll run the numbers for each combination of ship bases and the two orientations to get an upper and lower bound.
I'm also going to make some assumptions to simplify the calculations. The first is I'm going to treat all enemy ship bases as square (40mm for small ships, 60mm for medium ships, 80mm for large ships), even though they are slightly rectangular in practice. The second is I'm going to ignore the plastic part of our ship's base. This will save us an annoying calculation and only slightly overestimate the size of the firing arc.
Let's start with how the areas change when the enemy ship is parallel to ours.

The height of the bullseye arc actually stays the same. The center of the enemy ship base can be half of the enemy ship's length farther and still be in arc. However, the center of the enemy ship can't be any closer than half of the enemy ship's length or it'd overlap your ship. These cancel out, so the height doesn't change.
For the firing arc, it's best to keep the center rectangle the same and just work with the wings. For the wings, things get a bit messier because the corner of the enemy ship that touches the firing arc changes. The best way to figure out what's going on is to draw a picture, so here we go:

How do I draw dotted lines in Irfanview?
We can immediately see it's easiest to use the bottom-left corner of the enemy ship as our reference point for the right wing and double this area to account for the left wing. This lets us model the area of the wing as the same slice from the circle as calculated using dots plus the area of a parallelogram with height h and base b as indicated (thanks to our simplifying assumption of ignoring the plastic part of our ship base). The height of this parallelogram is the length of the enemy ship base.
Now we only need to calculate the base of the parallelogram, so it's time to bust out trigonometry!
We have a right triangle. We know the hypotenuse (longest side, opposite the right angle) is 300mm, the length of the range ruler. We also know the angle of the corner closest to our ship is 90 degrees minus the angle of the slice. The cosine function gives us the relationship between an angle of a corner, the length of the hypotenuse, and the length of the non-hypotenuse side attached to the corner. The length of the base is equal to the cosine of the angle multiplied by the hypotenuse. (If you don't remember much about cosine, just treat it as a button on your calculator. Plug in your angle, hit the button, and it gives you a number which you'll multiply the hypotenuse by. Just make sure it takes degrees and not radians.)
Now we have all the numbers we need. Be careful to take the numbers based on the size of your ship and the size of the enemy ship!
- The height of the bullseye arc and the height and radius of the firing arc is 300mm.
- The effective width of the bullseye arc based on the enemy ship is 55mm (S), 75mm (M), or 95mm (L).
- The effective width of the rectangular part of the firing arc is 34mm (S), 53mm (M), or 72mm (L) based on your ship.
- The angle of each slice is 40.62 degrees for small ships, 41.4 degrees for medium ships, and 41.76 for large ships based on your ship.
- The height of the parallelogram is 40mm (S), 60mm (M), or 80mm (L) based on the enemy ship.
- The base of the parallelogram is 195.3mm (S), 198.4mm (M), or 199.8 (L) based on your ship.
And we get these results:
- For your small ships, 18% (S), 23% (M), or 27% (L) of their firing arc is the bullseye arc based on the size of the enemy ship.
- For your medium ships, 17% (S), 21% (M), or 25% (L) of their firing arc is the bullseye arc based on the size of the enemy ship.
- For your large ships, 16% (S), 20% (M), or 24% (L) of their firing arc is the bullseye arc based on the size of the enemy ship.
In other words, roughly one-in-four to one-in-six of your shots will be in your bullseye arc. That's a large difference from when we used dots instead of ship bases.
Just tilt 'em (45 degrees)

We also need to know what happens when the enemy ship is offset by 45 degrees, because that should make the bullseye arc even larger. Things get messy, but thankfully I can gratuitously abuse the power of simplifying assumptions to make things easy again.
Let's start with the firing arc. It's actually the easy part, wings and all.

Now let's look at the bullseye arc. We'll go back to using the center of the enemy ship as the reference point.

It's not what it looks like.
The trapezoid at the top is pretty easy. But see those little triangles at the bottom? They're -censored-.
I'm invoking the power of simplifying assumptions and pretending they don't exist. That's actually accurate for large-base ships, but those triangles will be bigger for small-base ships. I don't care, they're not worth it.
The trapezoid is also pretty straightforward. The area of a trapezoid is its height times the average of the two bases. The height is half the diagonal of the enemy ship base. The long base is the width of the bullseye arc plus the diagonal of the enemy ship base. The short base is just the width of the bullseye arc.
Now, let's plug some numbers in:
- The is the height of the rectanglar parts of the firing arc and the radius of the wings is 300mm.
- The width of the rectangular part extending from your ship base is roughly 34mm (S), 53mm (M), or 72mm (L) based on your ship.
- The angle of each wing slice is half the angle of the firing arc. According to mu0n, the angle is 40.62 degrees for small ships, 41.4 degrees for medium ships, and 41.76 for large ships.
- The width of the rectangular part extending from the wings is 40mm (S), 60mm (M), or 80mm (L) based on the enemy ship.
- The width of the rectangular part of the bullseye arc and the long base of the trapezoid is 71.6mm (S), 99.9mm (M), and 128.1mm (L) based on the enemy ship.
- The height of the rectangular part of the bullseye arc is 271.7mm (S), 257.8mm (M), and 243.4mm (L) based on the enemy ship.
- The short base of the trapezoid is 15mm.
- The height of the trapezoid is 28.3mm (S), 42.4mm (M), and 56.6mm (L) based on the enemy ship.
And we get these results:
- For your small ships, 21% (S), 26% (M), or 29% (L) of their firing arc is the bullseye arc based on the size of the enemy ship.
- For your medium ships, 20% (S), 24% (M), or 27% (L) of their firing arc is the bullseye arc based on the size of the enemy ship.
- For your large ships, 19% (S), 23% (M), or 26% (L) of their firing arc is the bullseye arc based on the size of the enemy ship.
The hottest new strategy: 22.5 degrees!
This is left as an exercise for the reader.
Out of the spreadsheet, onto the board
First, let's recap the numbers. Here are the percentages of the total firing arc that the bullseye arc makes up. They depend both on the size of your ship (the shooting ship) and the size of the enemy ship (the target). The smaller number is if they're parallel to your ship, and the large number is if they're offset by 45 degrees.
- Your small ship: 18-21% (S), 23-26% (M), 27-29% (L)
- Your medium ship: 17-20% (S), 21-24% (M), 25-27% (L)
- Your large ship: 16-19% (S), 20-23% (M), 24-26% (L)
We can also break this down by range bands. For Range 1 (yes, sometimes the parallel chances seem to be larger than the 45-degree offset chances):
- Your small ship: 35-34% (S), 41-36% (M), 45-36% (L)
- Your medium ship: 31-31% (S), 37-33% (M), 41-34% (L)
- Your large ship: 28-28% (S), 33-31% (M), 38-32% (L)
For Range 2:
- Your small ship: 18-22% (S), 23-27% (M), 27-32% (L)
- Your medium ship: 17-20% (S), 21-26% (M), 25-30% (L)
- Your large ship: 16-19% (S), 20-24% (M), 24-28% (L)
For Range 3:
- Your small ship: 12-15% (S), 16-20% (M), 19-23% (L)
- Your medium ship: 12-14% (S), 15-19% (M), 18-22% (L)
- Your large ship: 11-14% (S), 15-18% (M), 17-21% (L)
That's a lot of numbers.

So let's simplify things. A survey by Gold Squadron Podcast found games averaged 11 rounds with 8 rounds of combat in X-Wing 1.0. I don't think this changed much in 2.0. Roughly 1-in-6 to 1-in-3 shots will be in your bullseye arc. You can reasonably expect 1 to 3 bullseye shots per game for ships that survive the full game and don't miss chances to shoot. Finally, while the size of your target matters a great deal, the size of the shooting ship doesn't matter too much. You don't have to feel too bad if you put a bullseye arc ability on a large ship.
Based on these numbers, here are some strategies which will significantly increase the number of bullseye shots you get:
- Get closer, ideally range 1.
- Go after their big ships and their formations.
- Get multiple enemy ships in arc.
- Angle your ship relative to the enemy ship, ideally 45 degrees (this increases the size of the bullseye arc by up to 25%, but also increases the size of your firing arc so it won't show up in the percentages above).
This can help you make decisions when list-building. For example, Predator may be hard to value if you think of it as a reroll for shots in your bullseye arc. Predator granting you roughly two random rerolls per game is much easier to think about. If Predator requires two uses to produce an extra hit but you're only averaging two uses of it per game, Crack Shot may be a better choice.
Now, go out there and try lining up your bullseye arc (or not)! Don't follow my example and spend more time mathing X-Wing 2.0 than playing it :).
Thursday, August 23, 2018
Some sleeper X-Wing 2.0 cards (including one that breaks the game)
Now seems to be the time to post X-Wing 2.0 list-building articles. Overall, people seem to agree that TIE Fighters, TIE Bombers, TIE Phantoms, and Trajectory Simulator are strong. A long list of pilots including Luke, Lando, Dash, Darth Vader, Whisper, Boba Fett, Guri, 4-LOM, and Fenn Rau are often coming up in these discussions. I haven't played X-Wing 2.0 yet, but I've noticed some potentially-strong pilots and upgrade cards which people haven't talked much about. Here's some stuff I'll be keeping an eye on.


Surprised to see this? Me too! It wasn't even the card here in the first draft (see third card below). It took me a while to figure out Static Discharge Vanes is the real culprit which breaks the game. Luke gunner has nothing on this.
If you play deck-building games long enough, you'll probably come across a fundamental rule of game balance. Some strong abilities will be balanced by making you suffer a strong drawback. Effects which prevent you from suffering the drawback are good. Effects which flip the drawback onto your opponent are really good and should be priced accordingly.
There are abilities in X-Wing which are balanced by a drawback of giving you a jam token (meh) or an ion token (harshest effect in X-Wing). Static Discharge Vanes prevent those drawbacks. Static Discharge Vanes makes your opponent suffer those drawbacks. Static Discharge Vanes costs 6 points and can be taken by most ships in the game.
If you're not convinced (and that's fair, because I haven't seen this card mentioned at all before), let's consider all of the cards which have jam or ion as a drawback and see how Static Discharge Vanes breaks them.
We'll start with an appetizer: a fun, wholesome combo that makes a bad card decent.

Taking Static Discharge Vanes with Freelance Slicer means half the time, you can jam two enemy ships if you take a stress. Jam is much weaker in 2.0 than in 1.0, but if only its drawback happened all the time, Freelance Slicer might be worth taking. That should be the first sign that something has gone horribly wrong.
Now, let's pair Static Discharge Vanes with a good card that has a strong drawback.

For 9 points and two upgrade slots, Static Discharge Vanes with 4-LOM says "When attacking a ship in range 1, you may gain 1 stress and 1 ion token. If so, the defender receives 1 ion token and can't spend a type of green token this attack." None of that "has to hit" or "spend a green token to avoid it" 2.0 stuff, just take the ion.
That sounds really good! I'd play it even if it didn't disable the green token. In other words, I'd play this combo if the entirety of the 4-LOM card said "While you perform an attack, you may take two ion tokens."
I'd play 4-LOM if it only had a drawback and no positive effect. Something has gone horribly wrong.
Now, let's break the game.

Yup. If your ship has Static Discharge Vanes and Feedback Array and catches a small ship in a head-on bump for just one turn, it locks that ship in place forever while burning it down.
 [Update] Reddit users killerardvark and YourHucklebrry suggest a different way to interpret Feedback Array. If the clause "If you do" applies to gaining the ion and disarm tokens and not triggering Feedback Array, then passing the ion token with Static Discharge Vanes would not trigger the damage. In this case, the combo would "only" lock the enemy small ship in place for the rest of the game since neither ship takes damage. I'd still consider that breaking the game.
You can even combine the two combos, where you also take 4-LOM to ion them at range 1 and make sure they bump next turn. If you miss the 1.0 range-1 death-zone, it's actually back and better than before!
There were some ships in 1.0 which do similar things (e.g. Captain Oicunn with Ion Projector and Emperor Palpatine, U-Wing with Ion Projector and Anti-Pursuit Laser), but they were more than half your list or much less reliable. The Feedback Array + Static Discharge Vanes combo costs just 10 points and can go on any ship with both an illicit and modification slot.
Let's pretend Static Discharge Vanes won't get nerfed into the ground and discuss good ships to use this combo on. The drawback of Feedback Array is it also hurts you, so you want something with high health. The generic Scum Falcon is probably the best option. It has a large base and 11 health, and costs only 56 points with these upgrades. Dalan Orberos in the medium-base Kimogila is also an interesting option at 58 points, since you can use his ability and R2 Astromech (+6 points) for more damage and extra health. Rebels can also take advantage of this combo with the generic Partisan Renegade U-Wing at 53 points.
If taking the ion token is required for the damage to trigger, your ship's hit points are no longer a concern. You can take a generic Z-95 pilot for 34 points, or upgrade to a Jakku Gunrunner for 38. The Scum Falcon is still a good option at 56 points. Similarly, Rebels can use Cavern Angel Zealot X-Wings instead for 51 points, but the Partisan Renegade U-Wing is still probably the better option at 53.
Besides turning your upgrade cards' drawbacks into your opponent's drawbacks, Static Discharge Vanes also turns one of the worst crit effects into one of the most hilariously beneficial effects I've seen if enemy ships are close-by. This is way better than drawing Damaged Cockpit on 1.0 bombers. I don't even know how many points I'd pay to have this crit every game.

Fortunately, Static Discharge Vanes has a counter which protects your ships from ion tokens. It's Static Discharge Vanes.
Don't be surprised if Static Discharge Vanes gets another errata (maybe before the game officially releases?) and/or if its point cost triples (I'll take the over). One candidate for an errata is not working on friendly effects which grant you the ion token. It's probably too late to add charges to this card.
Let's hope they fix this before Coruscant. (Or hope no one reads this article.)


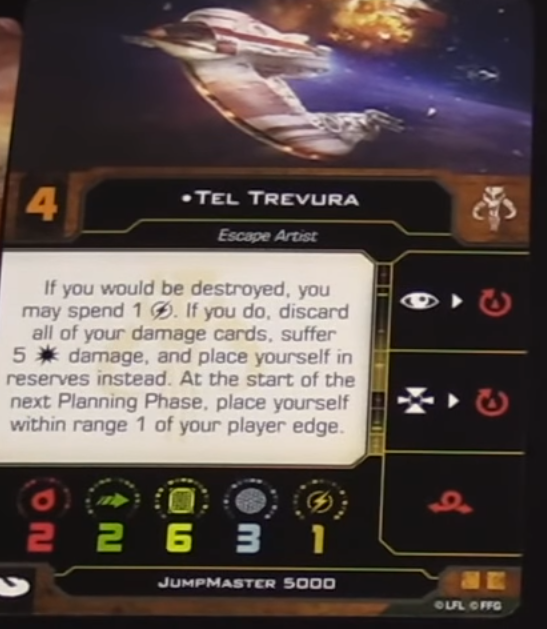


Just giving her more focus tokens could be wasted until she gets shot. Esege's flexibility gives her the extra focus tokens when she needs it and frees them up for other ships if she doesn't.
Now that Miranda's nerfed into the ground, Esege is probably the best K-Wing pilot. Is that enough for him to see play? We'll find out!
The biggest priority is secondary weapons. When you're shooting a secondary weapon, you're not shooting that primary weapon you paid for. That's great for 2-attack ships, but much worse for everyone else. This is probably why the TIE Bombers and TIE Punishers seem so strong.
I'd also like to see them add variable costing to action-efficiency upgrades based on the number of dice a ship has and possibly also its total health (e.g. attack + agility + health/5 round down). Action efficiency upgrades get better as the ship has more dice, and repeated-use ones get better when the ship has more health. This can come with a reduction in the point cost of ships with lots of dice, because they are generally overcosted without action-efficiency upgrades.
That's all for me. If you think there's another strong ship or upgrade card that's been flying under the radar, let me know!
Torani Kulda, M12-L Kimogila
Let's start with something strong but not game-breaking. Torani seems pretty straightforward at first glance. Her ability got an upgrade since you can't remove 0 green tokens to avoid it anymore, but two things make her much more interesting in 2.0. First, the return of swarms increases the chance of catching multiple ships in her bullseye arc. Second and more importantly, Torani now has an easy way to trigger her ability twice in one turn.
Yup, Cluster Missiles attacks twice, so it lets Torani trigger her ability twice. Obviously, twice is better than once. Most ships can handle taking one extra damage or removing one green token to avoid it. Few ships will have two green tokens to remove, and taking two extra damage in one turn is a big problem for most ships.
This combo is cheap, coming in at 55 points. For 3 more points, R3 Astromech gives you more flexibility and power with the Cluster Missiles. R5-TK is a janky alternative which gives you the option to shoot your own ships if your opponent tries to avoid double-taps by spreading out. Reddit user Alexij suggested using Munitions Failsafe with R5-TK. It counts as making an attack, but the attack on your own ship is guaranteed to miss and you conserve your charges.
Static Discharge Vanes
(Static Discharge Vanes got a Pre-Day-0 errata so it can't be used while stressed.
Spoiler alert: that might not be its last errata.)
If you play deck-building games long enough, you'll probably come across a fundamental rule of game balance. Some strong abilities will be balanced by making you suffer a strong drawback. Effects which prevent you from suffering the drawback are good. Effects which flip the drawback onto your opponent are really good and should be priced accordingly.
There are abilities in X-Wing which are balanced by a drawback of giving you a jam token (meh) or an ion token (harshest effect in X-Wing). Static Discharge Vanes prevent those drawbacks. Static Discharge Vanes makes your opponent suffer those drawbacks. Static Discharge Vanes costs 6 points and can be taken by most ships in the game.
If you're not convinced (and that's fair, because I haven't seen this card mentioned at all before), let's consider all of the cards which have jam or ion as a drawback and see how Static Discharge Vanes breaks them.
We'll start with an appetizer: a fun, wholesome combo that makes a bad card decent.

Taking Static Discharge Vanes with Freelance Slicer means half the time, you can jam two enemy ships if you take a stress. Jam is much weaker in 2.0 than in 1.0, but if only its drawback happened all the time, Freelance Slicer might be worth taking. That should be the first sign that something has gone horribly wrong.
Now, let's pair Static Discharge Vanes with a good card that has a strong drawback.
For 9 points and two upgrade slots, Static Discharge Vanes with 4-LOM says "When attacking a ship in range 1, you may gain 1 stress and 1 ion token. If so, the defender receives 1 ion token and can't spend a type of green token this attack." None of that "has to hit" or "spend a green token to avoid it" 2.0 stuff, just take the ion.
That sounds really good! I'd play it even if it didn't disable the green token. In other words, I'd play this combo if the entirety of the 4-LOM card said "While you perform an attack, you may take two ion tokens."
I'd play 4-LOM if it only had a drawback and no positive effect. Something has gone horribly wrong.
Now, let's break the game.
Yup. If your ship has Static Discharge Vanes and Feedback Array and catches a small ship in a head-on bump for just one turn, it locks that ship in place forever while burning it down.

You can even combine the two combos, where you also take 4-LOM to ion them at range 1 and make sure they bump next turn. If you miss the 1.0 range-1 death-zone, it's actually back and better than before!
There were some ships in 1.0 which do similar things (e.g. Captain Oicunn with Ion Projector and Emperor Palpatine, U-Wing with Ion Projector and Anti-Pursuit Laser), but they were more than half your list or much less reliable. The Feedback Array + Static Discharge Vanes combo costs just 10 points and can go on any ship with both an illicit and modification slot.
Let's pretend Static Discharge Vanes won't get nerfed into the ground and discuss good ships to use this combo on. The drawback of Feedback Array is it also hurts you, so you want something with high health. The generic Scum Falcon is probably the best option. It has a large base and 11 health, and costs only 56 points with these upgrades. Dalan Orberos in the medium-base Kimogila is also an interesting option at 58 points, since you can use his ability and R2 Astromech (+6 points) for more damage and extra health. Rebels can also take advantage of this combo with the generic Partisan Renegade U-Wing at 53 points.
If taking the ion token is required for the damage to trigger, your ship's hit points are no longer a concern. You can take a generic Z-95 pilot for 34 points, or upgrade to a Jakku Gunrunner for 38. The Scum Falcon is still a good option at 56 points. Similarly, Rebels can use Cavern Angel Zealot X-Wings instead for 51 points, but the Partisan Renegade U-Wing is still probably the better option at 53.
Besides turning your upgrade cards' drawbacks into your opponent's drawbacks, Static Discharge Vanes also turns one of the worst crit effects into one of the most hilariously beneficial effects I've seen if enemy ships are close-by. This is way better than drawing Damaged Cockpit on 1.0 bombers. I don't even know how many points I'd pay to have this crit every game.
Fortunately, Static Discharge Vanes has a counter which protects your ships from ion tokens. It's Static Discharge Vanes.
Don't be surprised if Static Discharge Vanes gets another errata (maybe before the game officially releases?) and/or if its point cost triples (I'll take the over). One candidate for an errata is not working on friendly effects which grant you the ion token. It's probably too late to add charges to this card.
Let's hope they fix this before Coruscant. (Or hope no one reads this article.)
Sigma Squadron Ace, TIE/ph Phantom
Alright, let's step back from breaking the game and just talk about strong but mostly fair options.
Whisper's still a popular pilot, but now that TIE Phantoms lost their 4 attack, they seem to be flying under the radar (har har). If you look carefully though, their base chassis is actually very good. The cheapest generic costs3 more points 1 more point than the same-PS X-Wing for essentially the same stat-line once their free evade is included (technically a better statline because the evade is a shield), and they have cloaking on top of that. They have built-in pseudo-regen by running away and evade -> cloaking to refresh their free evade. Their ship ability also gives them amazing synergy with Juke.
Whisper's still a popular pilot, but now that TIE Phantoms lost their 4 attack, they seem to be flying under the radar (har har). If you look carefully though, their base chassis is actually very good. The cheapest generic costs
Elite generics are often overlooked, but the Sigma Squadron Ace with Juke costs exactly 50 points. Juke gets stronger with higher initiative and more copies. You can fit four of these ships in a list, and while they'll usually shoot after aces, they'll often shoot before swarms at initiative 4. It should be lots of fun to fly. This is the list I'm most interested in trying out for 2.0.
Jumpmaster 5000 with Punishing One
This is probably "merely" balanced, but it still seems to be heavily underrated. The Jumpmaster 5000 is obviously much worse than it was in 1.0, and that's OK because it was nuts in 1.0. Forget all of that. It's no longer crazy strong in 2.0, but it's probably not as weak as people have been saying. Just pretend the 2.0 Jumpmaster with the Punishing One title is a front-arc only, 3-attack ship with 2 agility and 9 health. The generic Jumpmaster is 4 points cheaper than the generic Lancer-class Pursuit Craft, roughly the value of the 2 health for 1 shield. The Lancer-class has an extra turret arc, but the Jumpmaster has linked actions for rotating its arc. Similarly, Wedge with a hypothetical 2x Hull Upgrade and 1x Shield Upgrade would cost 68 points, which is only 4 points less than Dengar with Punishing One.
The builds to consider include just slapping Fearless on Dengar at 75 points (R3 Astromech or R5-P8 are also good options), Tel Trevura either light or with Hull Upgrade and/or R2 Astromech for 68-79 points, or just the generic Jumpmaster at 60 points.
Esege Tuketu, BTL-S8 K-Wing

Is he good? Is he meh? Is he overpowered? I'm not sure, but Esege reminds me of Manaroo now that his ability works on defense.
The first iteration of Dengaroo saw Manaroo with Recon Specialist and Dengar with R5-P8. Dengar eventually moved to Overclocked R4, but the original version was still pretty strong. The moral of that story is giving a 2-agility ship even two focus tokens a turn is pretty good.
Manaroo's ability was nerfed to range 1 and she mostly disappeared from the game after the Mindlink nerf. Esege's ability works within range 2 -- will that be enough? He's pretty affordable at 60 points with Perceptive Co-Pilot and has the option to take bombs to deter pursuit, Advanced SLAM for more speed, and Barrage Rockets for some offense.

Manaroo had Dengar to support, and the Rebel version of Dengar is Dash. Despite different playstyles, Dash is similar with a big attack and two agility to make good use of the extra tokens. He also likes playing around obstacles and will often enjoy extra green dice.
This synergy isn't the strongest, because 1.0 Dash did prefer to fly alone and this combo doesn't work so well with Bistan gunner. Still, it's probably worth a try.
I don't think Rebels have the aces to fly a "Manaroo Aces"-style list (maybe Corran + Jake/Arvel?), but Esege might work to enable an efficient jousting list. Unlike Benthic Two-Tubes, he doesn't have a native 3-dice attack or combo with Edrio Two-Tubes. However, his focus tokens go where they are needed, and his flexibility give him special synergy with some ships.
The largest synergy is with Red Leader Garven Dreis in either the ARC-170 or the T-65 X-Wing. Esege effectively gives Garven infinite focus tokens at range 2.

Shara Bey also likes more focus tokens, especially if she has R3 astromech to use her ability for both offense and defense.
The first iteration of Dengaroo saw Manaroo with Recon Specialist and Dengar with R5-P8. Dengar eventually moved to Overclocked R4, but the original version was still pretty strong. The moral of that story is giving a 2-agility ship even two focus tokens a turn is pretty good.
Manaroo's ability was nerfed to range 1 and she mostly disappeared from the game after the Mindlink nerf. Esege's ability works within range 2 -- will that be enough? He's pretty affordable at 60 points with Perceptive Co-Pilot and has the option to take bombs to deter pursuit, Advanced SLAM for more speed, and Barrage Rockets for some offense.
Manaroo had Dengar to support, and the Rebel version of Dengar is Dash. Despite different playstyles, Dash is similar with a big attack and two agility to make good use of the extra tokens. He also likes playing around obstacles and will often enjoy extra green dice.
This synergy isn't the strongest, because 1.0 Dash did prefer to fly alone and this combo doesn't work so well with Bistan gunner. Still, it's probably worth a try.
I don't think Rebels have the aces to fly a "Manaroo Aces"-style list (maybe Corran + Jake/Arvel?), but Esege might work to enable an efficient jousting list. Unlike Benthic Two-Tubes, he doesn't have a native 3-dice attack or combo with Edrio Two-Tubes. However, his focus tokens go where they are needed, and his flexibility give him special synergy with some ships.
The largest synergy is with Red Leader Garven Dreis in either the ARC-170 or the T-65 X-Wing. Esege effectively gives Garven infinite focus tokens at range 2.

Shara Bey also likes more focus tokens, especially if she has R3 astromech to use her ability for both offense and defense.

Just giving her more focus tokens could be wasted until she gets shot. Esege's flexibility gives her the extra focus tokens when she needs it and frees them up for other ships if she doesn't.
Now that Miranda's nerfed into the ground, Esege is probably the best K-Wing pilot. Is that enough for him to see play? We'll find out!
One last aside on variable costing
Variable costing is probably one of the best ideas in X-Wing 2.0. It has a complexity cost, but it's the only way some upgrades can be balanced for all different types of ships. In fact, FFG should probably use variable costing more often.The biggest priority is secondary weapons. When you're shooting a secondary weapon, you're not shooting that primary weapon you paid for. That's great for 2-attack ships, but much worse for everyone else. This is probably why the TIE Bombers and TIE Punishers seem so strong.
I'd also like to see them add variable costing to action-efficiency upgrades based on the number of dice a ship has and possibly also its total health (e.g. attack + agility + health/5 round down). Action efficiency upgrades get better as the ship has more dice, and repeated-use ones get better when the ship has more health. This can come with a reduction in the point cost of ships with lots of dice, because they are generally overcosted without action-efficiency upgrades.
That's all for me. If you think there's another strong ship or upgrade card that's been flying under the radar, let me know!
Monday, August 6, 2018
How impactful are critical hits in 2.0?
Besides the new rules, pilots, and upgrade cards, 2.0 brings a new critical hit deck. With the new damage deck, you may have questions like:
Obviously, critical hit cards affect different ships differently. To capture how different ships receive different impacts from critical hit cards, I separately consider their effects on two different classes of ships:
Of course, some types of ships are uniquely affected by some critical hit cards. I'll leave that for you to consider.
My general findings are:
For the tables and methodology, see below!
Critical hit effects fall into one of four categories:
Besides quantifying the critical hit effects, I also assign an impact value to each critical hit card:
Unfortunately, the full tables with the descriptions of the critical hit effects and the notes are too wide for this blog! You can find them on here, and I suggest looking at the full-size tables since they're probably easier to read. I've included the abbreviated tables below.


- Should I include pilots or upgrades which add crits or expose/repair damage cards in my list?
- Suppose I have a very important attacking chance; do I spend focus to avoid a crit or save it for my attack?
Obviously, critical hit cards affect different ships differently. To capture how different ships receive different impacts from critical hit cards, I separately consider their effects on two different classes of ships:
- "Durable" ships which can live for several turns after taking hull damage (through health, defenses, or arc-dodging), and usually have higher initiative. Aces and large ships are examples of durable ships.
- "Fragile" ships which probably have one more attack and maneuver left by the time they start taking hull damage, and usually have low initiative. TIE Fighters and B-Wings are examples of fragile ships.
Of course, some types of ships are uniquely affected by some critical hit cards. I'll leave that for you to consider.
My general findings are:
- Critical hits are really bad for durable ships. Half of the critical hits can significantly limit a durable ship.
- For fragile ships, a critical hit costs one action on average with some upside.
- Repairing critical hits isn't too useful unless it happens between receiving the critical hit and your next maneuver. Otherwise, less than 1 in 5 damage cards have a high impact on durable ships and can be repaired. For another 1 in 3 cards, repairing saves you an action.
- Compared to the 1.0 TFA deck, the 2.0 damage deck is worse for durable ships and better for fragile ships.
- Compared to the 1.0 TFA deck, the 2.0 damage deck affects more maneuvers but causes fewer lost shots.
- STRONGER: there are fewer "free" actions in 2.0, so the value of a lost action is higher.
- STRONGER: maneuvering is more important in 2.0 since there are no 360-degree turrets.
- WEAKER: each game turn is slightly less important due to lower offense across the board.
For the tables and methodology, see below!
Critical hit effects fall into one of four categories:
- Lost actions. Usually this is an action spent on repairing a card.
- Maneuvers affected. I assume straights, banks, turns, and other maneuvers are each 1/4 of your maneuvers, greens are 1/3, whites are 1/2, and reds are 1/6 of your maneuvers.
- Damage taken. "Direct Hit!" is the clearest example.
- Lost attacks. 1.0 Blinded Pilot is the clearest example, but I'll also count Weapons Failure as a partial lost attack.
Besides quantifying the critical hit effects, I also assign an impact value to each critical hit card:
- Low: less than the impact of losing an action, and often doesn't affect the game at all
- Medium: roughly the impact of losing an action
- RNG: sometimes costs one action, but sometimes it costs many actions
- High: greatly reduces the effectiveness of the ship; creates large swing in the game state
Unfortunately, the full tables with the descriptions of the critical hit effects and the notes are too wide for this blog! You can find them on here, and I suggest looking at the full-size tables since they're probably easier to read. I've included the abbreviated tables below.
Subscribe to:
Posts (Atom)